You know that overly optimistic timeline? Well, life happened. After that last post, things became super crazy. I had multiple weeks with not one moment of down time. Not exaggerating at all. Just about did me in.
This week has been *somewhat* of a reprieve and I have begun again. The master bedroom organizational needs have turned out to be greater than anticipated. Yet, the end is now in sight and it's going to be SO MUCH BETTER than what was there before. My jewelry wall if fairly awesome, if I say so myself. :)
Pictures soon.
P.S. My office looks nothing like the picture below anymore. I spent much of today going through the entire house to find things for DI. It looks like a tornado hit. But once I deal with the aftermath, things are going to be more manageable!
Friday, May 11, 2012
Tuesday, April 17, 2012
Master Bedroom Organizing - Day 1
Last night I began on my bedroom. Technically I just started cleaning the laundry that I hadn't put away for some time. Rather hypocritically, I make sure the kids get their laundry put away right after they do it, but I just always have other things to do when it's my turn. :)
In one hour my bedroom was transformed and I could look at the project I need to do...
I took off my closet door a month ago in preparation for a jewelry wall. I have been planning to build some shelves - sort of like picture ledges, but deeper - to hold my earrings and such and then put hooks underneath for my long necklaces. Today at IKEA however, I came across a solution I wasn't even looking for. One of their rail systems had ceramic trays that were being clearanced. I don't think they'd be great in the kitchen, but for jewelry....
The best part of this solution for me is that I don't have to back the van out of the garage to use the saws. It's really just the little things, ya know?
Sunday, April 15, 2012
Office Completed
It may have taken me many days, but I did push until it was tidy. Granted there are nooks and crannies that could still use some purging (like the drawers under my desk) but for the most part, everything is in it's place.
My real accomplishment was the big bookcase. It stores a LOT of stuff that was previously not so pretty. I organized pictures that I hadn't touched in many years. I decided to add the photo boxes along the top to maximize my storage space. I also labeled just about everything. It makes me happy.
The master bedroom is next. It's a desperate situation. :)
Friday, April 13, 2012
Office - Day 4?
So I may or may not have underestimated. Yet what I underestimated was not the organizing that needed to be done, but how BUSY I am. I thought I had been wasting more time than I actually do. I have not had time to catch my breath in the last 4 days.
I am not daunted though. I feel rather empowered. Albeit slower than dreamed, I can still make progress. My big bookcase is showing signs of promise. :)
I think the differentiating factor is that I've broken in down into manageable parts. When I think of organizing the whole house it seems impossible, but I can do it one room at a time.
Thursday, April 12, 2012
Office - Day 3
Yes, today is my third day working on my office. The two previous days were much too busy, but today I'm actually making a bit of progress. My big 5x5 Expedit is in here and I'm finally addressing it. In order to free up more of the 25 squares (since I obviously have a LOT of stuff), I purchased 8 new black photo boxes today. They are now all labeled and organized on top of the massive bookcase....and they look pretty good.
I sorted through some picture piles that had been around for a while. I think I've probably been throwing miscellaneous photos in these piles for nearly 10 years. I was kind of shocked to find I never organized them before. Oh well. I'm doing it now.
I WILL wrap up the office tonight if it kills me. Tomorrow - my bedroom.
Tuesday, April 10, 2012
Office - Day 1
These posts will really be mostly for me. I'm making myself accountable to...myself. :)
Today was really quite busy and rather dramatic. Life is interesting.
I did have a little bit of time and I cleared off my desk and addressed the piano music lack of storage- go me! I'm going to extend my office to another day so I can work on the big bookcase some.
Having a plan makes a difference. Expecting myself to work on an area allows me to get to some things I wouldn't have otherwise even thought of tackling.
Monday, April 9, 2012
Spring Organizing
Time for spring cleaning organizing.
My house has gotten out of hand. It feels overwhelming. In a smaller home you have to keep it organized just to be able to fit everything, but here I have plenty of room to stash things until I get around to taking care of them. Obviously, the problem is that I don't always get around to it...
Here's the plan:
*Split up the house by rooms.
*Decide on one or two days for each room.
*Organize all aspects of the room.
*Finish small projects.
*Feel good for accomplishing something.
*Make a list of future projects for each room.
Tomorrow is going to be a busy, crazy day, but I'm going to start anyway.
Possible Room Order:
Starting tomorrow...
My house has gotten out of hand. It feels overwhelming. In a smaller home you have to keep it organized just to be able to fit everything, but here I have plenty of room to stash things until I get around to taking care of them. Obviously, the problem is that I don't always get around to it...
Here's the plan:
*Split up the house by rooms.
*Decide on one or two days for each room.
*Organize all aspects of the room.
*Finish small projects.
*Feel good for accomplishing something.
*Make a list of future projects for each room.
Tomorrow is going to be a busy, crazy day, but I'm going to start anyway.
Possible Room Order:
- Office - 1 day
- Master Bedroom - 2 days, need to do jewelry wall
- Kids bedrooms - 1 day, all are in decent shape with a few hooks to be hung
- Kitchen - 2 days, lots of organizing, new spice storage setup needed, roller shade
- Family room - 1 day, organize cupboards, hang artwork, put pulls on
- Laundry, Bench, Foyer - 1 day, hang mirror and organize
- Basement - 2 days, yikes!
- Front room - 1 day, organize book cases, easy
- Garage - 1 day
- Daniel's office - 2 days, enlist Daniel's help :)
Starting tomorrow...
Sunday, March 25, 2012
Stalled
I happened to call my sister today while she was looking at my blog. "You've never posted any pictures of your finished cupboards," she said. So true, so true.
You see, I did finish and paint them (more or less) and I've learned to really like them too. The rest of the room however, will take some time joining my vision and has left me feeling uninspired to post.
The necessities of daily life seem to be enough to fill nearly all of my time. I have way too big of plans for the time alloted. Honestly between church responsibilites, school volunteering, feeding my family, cleaning, spending time with the kids, cleaning, meetings, kids activities, cleaning, other people's needs, and cleaning there is very little time to fit a project in.
Here's hoping for a productive week.
Thursday, March 8, 2012
Master Bedroom Makeover Part 2
Finally time to paint. The molding and lower wall are the same almost white color that the rest of my house trim is. Luckily Kwal knew what color that was since our house was built by Ivory and it's their standard molding color.
And then I painted the rest of the room a beautiful light gray. I will go look at what the color is later. I've forgotten at the moment.
Hooray!
(Don't mind my side tables. They are a hand-me-down from my mother and someday I plan to revamp them by making them taller and painting them and.....someday I'll get to it. For now I like that our alarm clocks don't shine in our faces.)
I do plan to add something above the bed, but haven't found just the thing yet.
Look at all that space underneath the bed! I store all of our swimming gear, Halloween costumes, and luggage under there with room to spare.
I loved this bedding from the first time I saw it. I don't think Target carries it anymore, but I think I'll be happy with it for some time.
The rest of the furniture in my room was purchased by my mom at a garage sale for my 16th birthday. She painted them mint green while I was away at camp once. They stayed that way until I painted them white 10 years ago in a surprise bedroom makeover in our last house while Daniel was out of town. They are old, but super sturdy. I took the top drawer out of this dresser to accommodate the DVD player. Since we don't watch much television, this TV is there for exercising.
I took the original mirror off of the long dresser and plan to hang this new one on the wall at some point.
Though I have more planned such as taking down the wimpy dim light fixture and redoing a chandelier from downstairs, I think it is quite lovely enough. It feels clean and relaxing.
Before:
And after:
Master Bedroom Makeover Part 1
This is a picture of the master when we first looked at the house.
And just after we moved in.
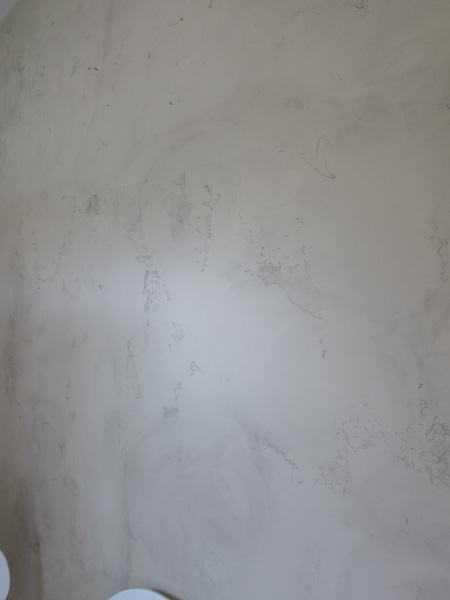
It had a unique painting technique. I called is 'dirty rag wipe'. The next pictures are me trying to capture the effect.
It was different than what is in the rest of the house, which has a glaze that brings out the texture (planning to change that too). I didn't mind the turquoise, but overall the master bedroom walls looked dirty. I wanted to go in a completely new direction.
Starting on the molding. I opted to only do one wall for the first time ever. (This house is so big that I don't think I can do things the same way I have before. Every project seems more expensive and takes more time.)
I wanted it to be more substantial than a lot of the board and batten I've seen lately and also a little more traditional so I added the extra trim piece to all the edges. If I had a router I could have accomplished the same effect. This is my workaround. (The picture of mangled fingers and the accompanying story the first night of my woodworking class has prevented me from owning my own router. I'm getting closer to giving in though.)
I only had to deal with one inconvenient corner...
I took the room's baseboard off and put in back over the top of my new boards so it looked continuous with the rest of the room.
I also filled in a bit of the texture on the walls so it wasn't so obvious my wall was showing through.
Somehow, even with it only being one wall, my projects manage to take a long time. I seem to underestimate the work required more often that not. Maybe that's how I keep going. :)
Almost to the paint!
Monday, March 5, 2012
A King Size Bed
I have very few pictures of my completed projects, which doesn't help when you finally feel like putting up a blog post late at night. Pictures of finished rooms must be taken in the daylight and when things are clean and lovely. That takes effort. Thankfully I did make that effort today for my master bedroom and took some pictures of it in it's current state. These are not those pictures. I was reminded that I never posted about the bedframe I made last summer and that must come first:
I had wanted a king size bed (and most importantly a mattress that didn't hurt my back) for some time, however the cost of not only the mattress, but also the foundation and bedframe and bedding didn't excite me. So I concocted a plan to make my own bedframe and headboard. My parents have made lots of these type of bases for their beds (mine is somewhat modified) and my mom loves the storage they allow for underneath. I made mine sit 14" off the ground so I could slide those clear sterilite tubs under it.
Essentially the bed base is just a pywood top with posts cut to size for legs. I built the bed in two pieces so it would actually be able to be moved in and out of the room. Though you can't see in in the picture, each side actually has a center leg for support (total of 5 per side). The mattress is veeeery heavy. I scooted the legs in a bit so you wouln'd stub your toes.
I sent 2 bolts through the top to secure each leg. I also trimmed the edges a bit so they wouldn't be so sharp. I wasn't paying attention at one point and rounded more edges than needed.
I covered them in batting to cover the bolts and protect my mattress. I had planned on also adding a layer of fabric, but realized the texture of the batting might actually keep the mattress from sliding around. (In the end it didn't matter since I put a bedskirt over it.)
The base all ready for the mattress.
Perfect. The fantastic thing about this bed is that you don't have to buy a foundation (or what used to be a box spring). According to the guy at the store the foundation is just a hard base. It is not neccesary at all for the mattress. For me that means that I have more storage room and it just cost that much less!
Yay for storage!
For the headboard, I decided on a shape I wanted after searching for ideas forever. I drew it on a sheet of particle board. I would love to say that I thought ahead and used poster board to make the curve and then copied it onto the board, but I didn't. It was a little trial and error. I added 2" (expensive) foam to the front (with spray adhesive), which I found painfully difficult to cut. I'd rather not talk about it. I've heard an electric bread knife works well. I don't own one.
I have no pictures of these steps.
I then wrapped the front and sides in the same batting stuff I used for the bed base and stapled it to the back. The fabric went over that and was also stapled to the back. The fabric I chose is actually a suit type fabric from Joann's. I just couldn't find the right color and texture in anything else. Turns out that it worked well and is really soft.
To attach the headboard to the base I used an extra board which was bolted to the headboard and then the base legs. These bolts are removable.
Tada! I had purchased enough of the headboard material to make my own bedskirt. I didn't even think about using a store bought one since I just wanted my bed to be whatever height I chose. However, I came across a clearance target bedskirt for $10 and picked it up on a whim. It fit perfectly and was close enough to the color that I doubt I will ever make the bedskirt I planned.
At first I only had king sheets and put some old queen bedding on.
Then I got my new bedding. (Love.) Obviously it didn't coordinate with the turqoise. I never intended it to. :)
P.S. I did run into a few unexpected problems. Orginally I had planned to do nailhead trim near the edge. It wasn't until after I added the thick foam (not in my origianl plan) that I realized I would have nothing to put the nailhead trim into. I abandoned the trim plan and ended up liking the headboard even better I believe. The final unforseen (because once again it wasn't in my origianl plan) problem that darn thick foam created was that in order for the now-thicker headboard to rest on the bed base the mattress had to bed scooted down and the bed base is now 2" too short. My bedding doesn't stay in as well as I'd like. I might try to fix the problem someday, but not now. Too many other things to do...
Monday, February 6, 2012
The Built-ins Part Two
I was pretty excited to finish my first working drawers. They weren't so bad once I understood the hardware. (I am half tempted to go back to Home Depot and inform them of the different ways to mount drawer glides.)
The shelf in the bottom part is in too. FYI, the drawers of the left and right were already there.
I used my Kreg Jig that I received for Christmas to build the drawers (it's essentially a pocket hole guide). I didn't make them quite like a traditional drawer, but I think mine are sturdier. :)
I removed all the decorative legs and chopped some of the top off of each one to get off that nasty hard glue that held the old countertops down.
Once the new countertops were ready I realized that they sat too low. I added some boards to support them better and give them more height.
(The cupboard doors are all a little crooked. I was trying to make my new drawers align as best I could, but now that the countertops are on, I might have to do some adjusting.)
So far so good. I've got a lot more to accomplish in a short time. There are people coming over on Thursday and it needs to be done!
P.S. After spending a decent amount of time looking at the construction of the cupboards, I'm fairly certain I could build them much better from scratch.
Subscribe to:
Posts (Atom)